Saturday, 4 October 2014

Refashioned crop top...

Next up is a refashioned cropped top into a dress. 


I loved this top, but unfortunately I am rather blessed in the bra department, so it kind of hung off of me and made me look larger than I am. I like a good fitter top half! 

I had some spare black fabric that I gathered with elastic. I then used a zig zag stitch to sew it onto the top. 


The zig zag stitch allows for a certain amount of elasticity to the waist of the dress. 

This was still a fairly simple refashion for me. As I said in my last post, I do love a quick project :) 

Until next time :) 

The shirred part...

Hello again. The first lot of handmades are 3 skirts and 1 dress. Why have I lumped 4 projects together in one post I hear you ask? Because they are all basically the same! 


Starting from the left...

I quickly whipped up this dress before we went on holiday this summer. It was never meant to be 'wearable' as such, it is a beach/pool dress. 


I simply cut a rectangle, made a tube, shirred a couple of rows at the top, and made a belt. I also shirred the straps, as I wanted to be comfortable. 

Next up, my vertical striped skirt.


This one was an old cotton dressing gown I bought in a charity shop for £1! I sliced off under the arms, and straightened everything out (hence the many seams). Then literally the same as above. Tube, shirrrrrrr away, wear. 

The last two were old dresses that I cut up into a flat piece of fabric. 


Can you guess how I made these? 

Yes. Exactly the same. 

Now whilst I love a good 'proper' project, I also love the simplicity and speed of a simple garment. I wanted to have lots of handmade garments for my holiday, but I didn't have much time. These were the perfect solution. 

The next post will show a different project!

What I've been up to...

So, I've been a bit quiet on the sewing front lately. To be honest with you, I've been so in the zone, I've not even thought about blogging them! I just think of the next project!! 

Here's a sneak peek of what will feature in the next few posts. 


NINE handmade items!! 

I have been a busy bee! I won't do 9 separate posts for these, as some of them are either very similar, or just simple. 

I look forward to telling you about them!!

Friday, 3 October 2014

Considering a giveaway?

Hey guys, I've been thinking for a while that I want to make my blog a more regular thing. And I quite like the idea of giveaways.

Problem is, I don't have any followers in order to have the giveaway haha!

If you do happen to see this post, please feel free to follow! A giveaway to me is not really viable if hardly anyone participates haha!!

Go forth little craftsters, and share, re-blog, +1, shout from buses, just tell someone!!

Sunday, 28 September 2014

I did it!

Well, you all know I've been at uni for what seems like forever, but I finally graduated this week!

Best of all, my husbands graduation was on the same day, so we were able to get some photos of us both in our gowns which was lovely.


Our graduation was on Plymouth Hoe, so of course we had to get Smeatons Tower in our pics!

It feels awesome so have finally finished uni, it's been the hardest thing I've ever done.

Oh, yes that is the dress I refashioned a few posts back :) I got some compliments which was nice!


Speak soon!

Nude nails and heart tutorial...

Hey guys! 

Just a quickie today, I'm going to show you how to get nude nails with little black hearts! 


Firstly, paint your nails in a nude shade you love. You could also do any colour you like, but I think using a pastel/nude colour looks sophisticated for work. 

Next, dab a small puddle of black nail varnish. I've learnt to only have a small puddle at any time. You can always put more down, but you can't scoop it back up if you use too much. 


Then, using a nail dotter...

Small note, I did another post on how to make your own nail dotter. Do check it out! But since then I found a pack of 5 on Amazon for 1p!! Since it cost the earth (haha!) I treated myself. Bargain! 

Anyway... Using a nail dotter, make two dots. These will be the top curves of the heart. 


Add in another dot at the bottom. Join this dot, to one of the top dots. 


You now have half a heart! 

Now join the bottom dot to the other top dot. 


You now have a heart!! 

Neaten up any edges with the dotter, and wait to dry. Wait more than you usually would, as the hearts are quite dense with nail varnish. You don't want them to smudge! 

When dry, put on a top coat to level everything out. 

BEAUTIFUL! 


Until next time!


Thursday, 18 September 2014

Graduation dress...

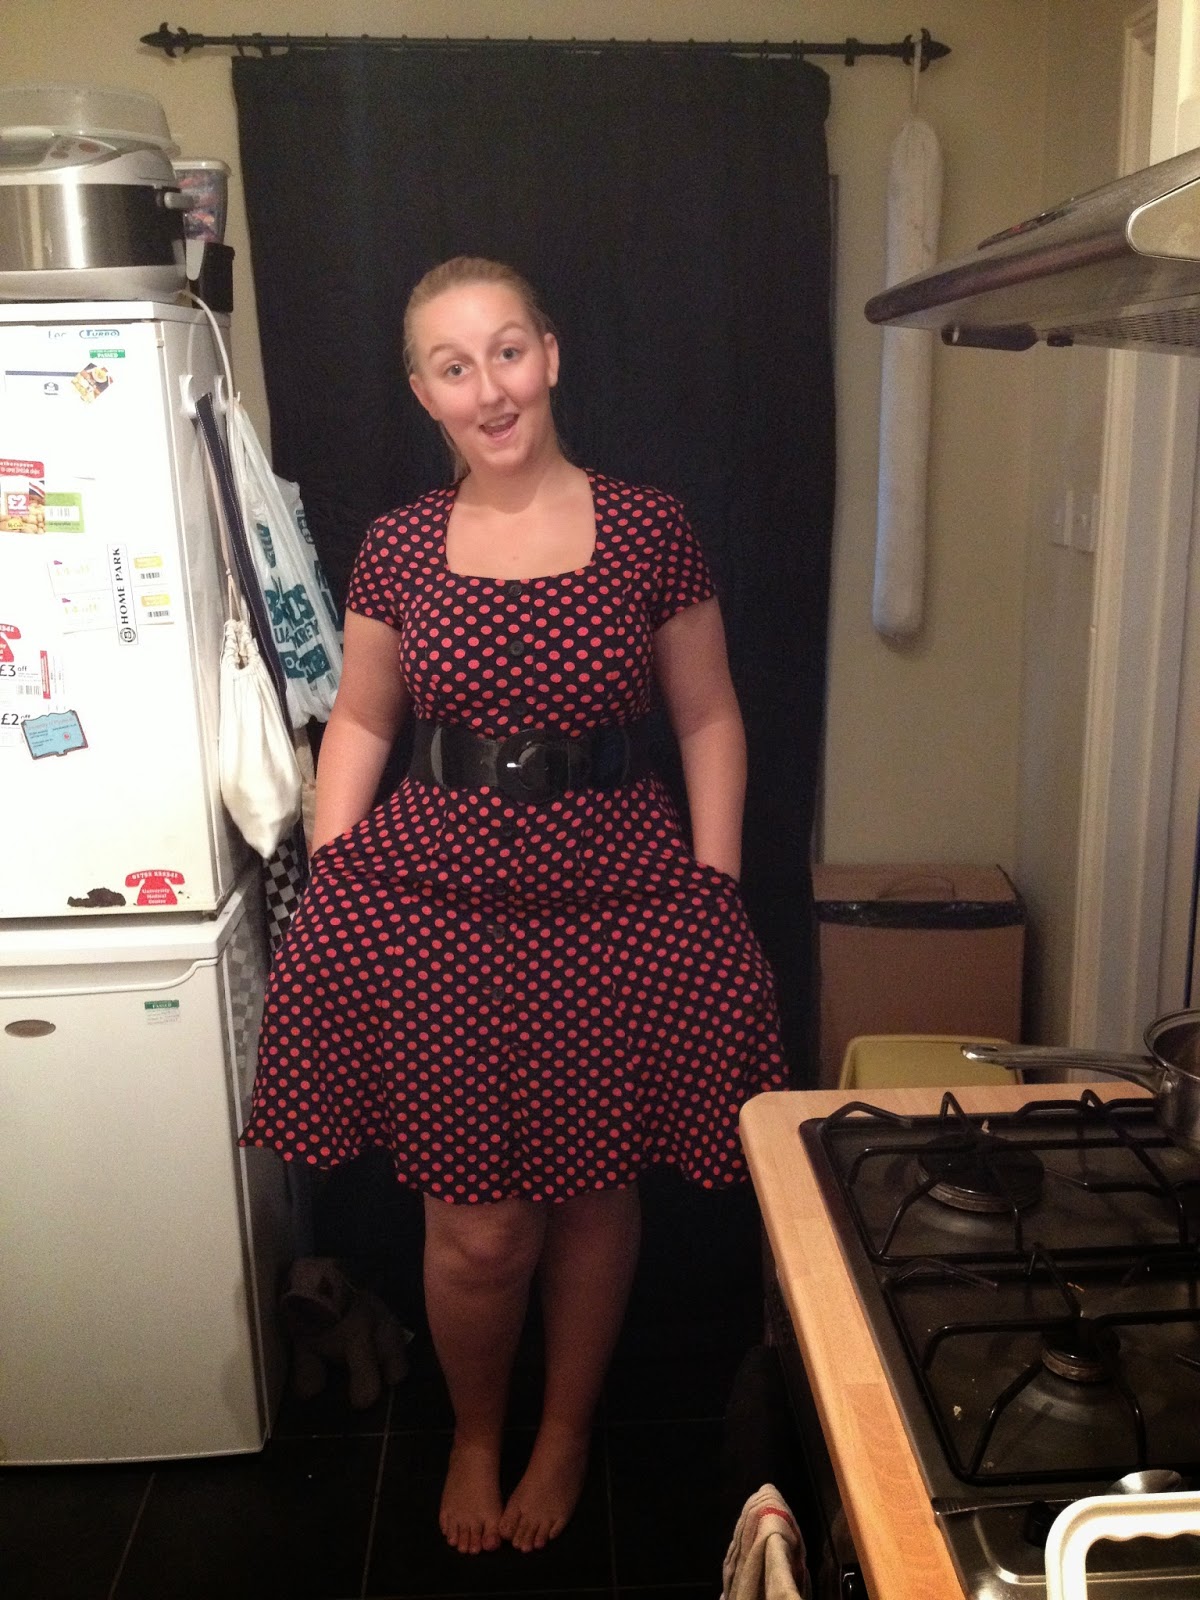
I've been a busy bee lately! I have made countless items of ACTUAL WEARABLE CLOTHES! Not just dresses either, everyday skirts and blouses too. I've also done a lot of re-fashions. Here is one I bought this week for £1...


This far too long black and red polka dot dress! Miraculously, not a bad fit :) But the poor unloved dress had hundreds of moth holes and tiny little tears. It also had some lovely shoulder pads haha! I didn't take pics of the moth holes because there were so many of them, I would still be there fixing them now!

Anyway, as the fit was fine, I simply cut the bottom of the dress into a slightly dipped hem (to help cover my ginormous bum!!), fixed the holes and tears, and also stitched up the button holes. As a lady with a larger top half, button down dresses and tops tend to gape and show everything off haha!


Oh, and it has pockets!!


Look how flowy it is!!


I had kind of forgotten that my graduation is next week, so how lucky was it to come across this dress? I actually saw it as I was on my way out of the shop! And for £1?! I will be the cheapest dressed person there, and I won't even care because I made it look awesome :D

Until next time :)